How do you add signature in Mac Mail – complete guide
How to add signature in Mac Mail
1. Log into the ‘Mail’ app on your Apple Mac device.

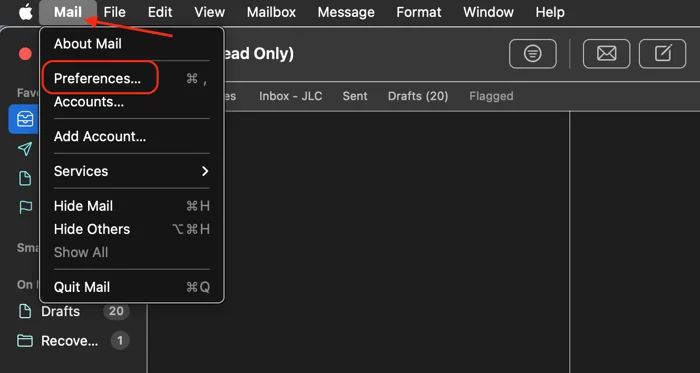
2. Now, Go to ‘Mail’ and then go to “preferences’ to open settings menu.
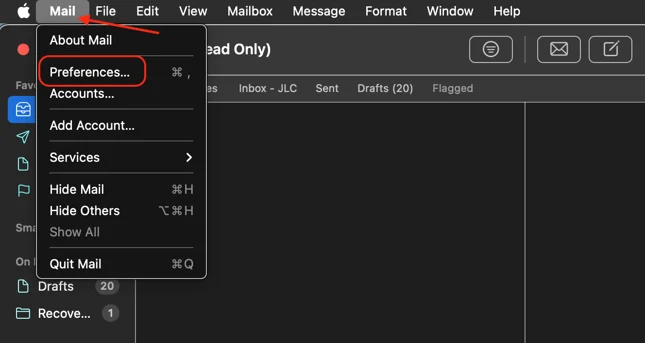
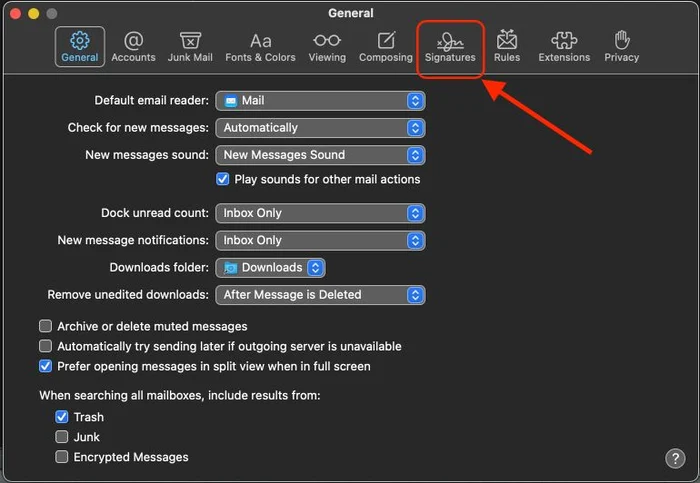
3. Then, Select ‘Signatures’.
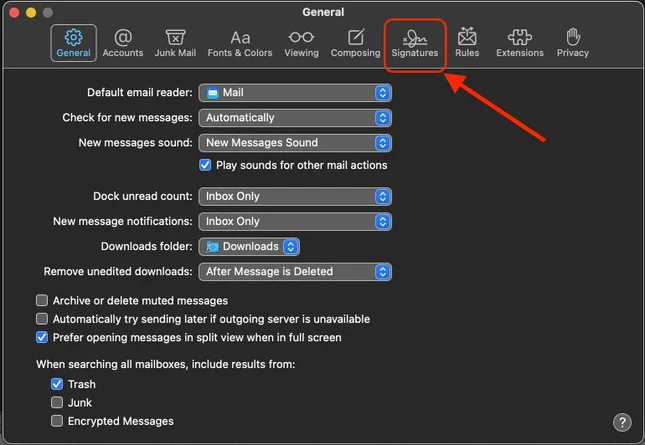
4. Next, in opened left panel for account list, select the account you want to create a signature for.
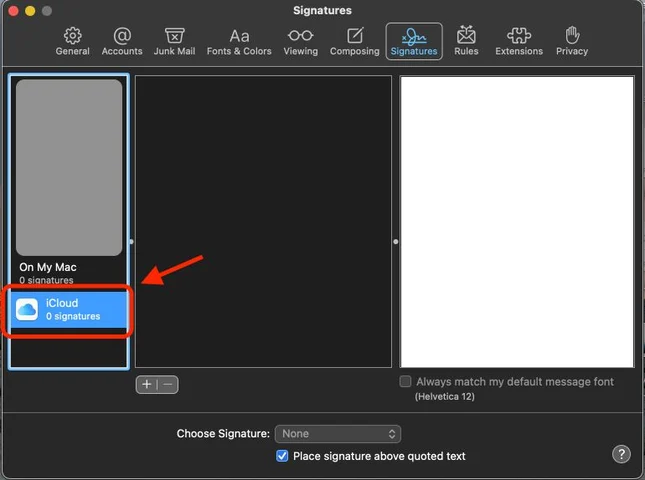
5. Now, Select the “+” button opened in bottom part the middle panel to add a email signature.
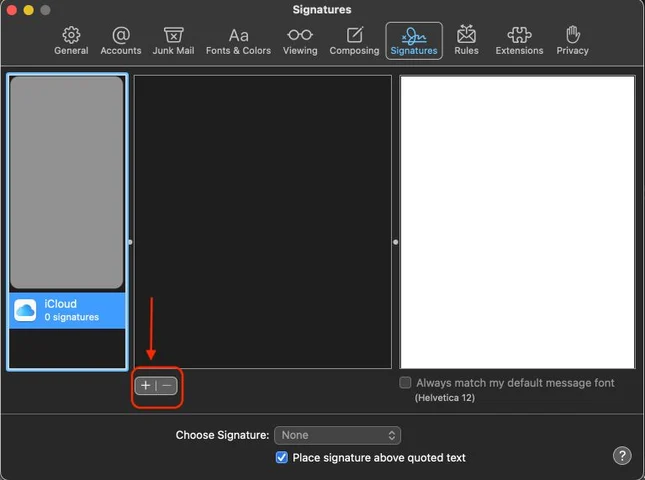
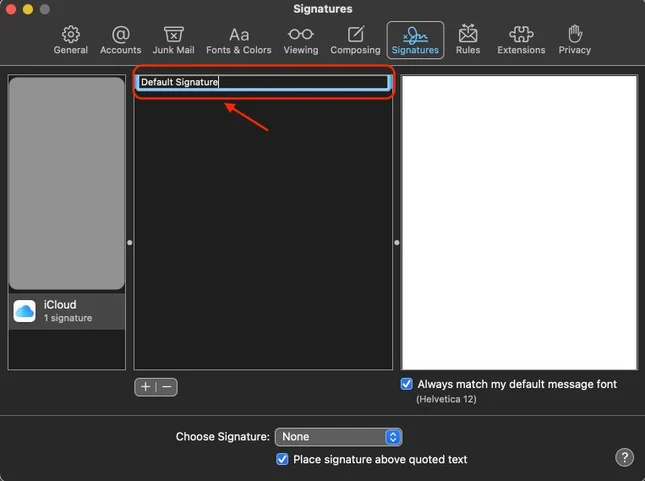
6. In Signature list column (middle column), type a separate label for the mail signature, such as “Default Signature.”
7. Use preview area (right column) to create your desired emails signature. You can add text, alter formatting, and even add an image by drag n drop an image into the preview box.
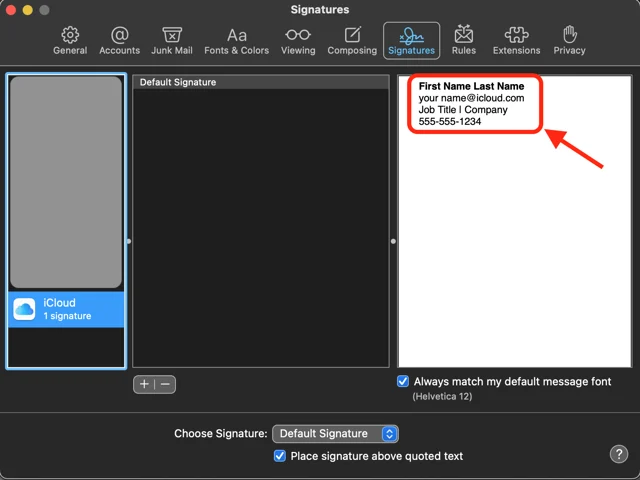
The saved email signature will now be available to choose when you are writing an email in apple device.
Special Note:
Make sure you UNCHECK always match my default message font from the right bottom while pasting the signature.
Automatically add signature in Mac Mail emails
Follow below steps to automatically add your email signatures in mail you send everytime.
1. Open the Mail app and navigate to ‘Mail’, then “preferences’.
2. Next, click on ‘Signatures’ and select an account in the left column.
3. Finally, from ‘Choose Signature’ dropdown menu in the middle column, select the email signature you want to automatically add to you emails.
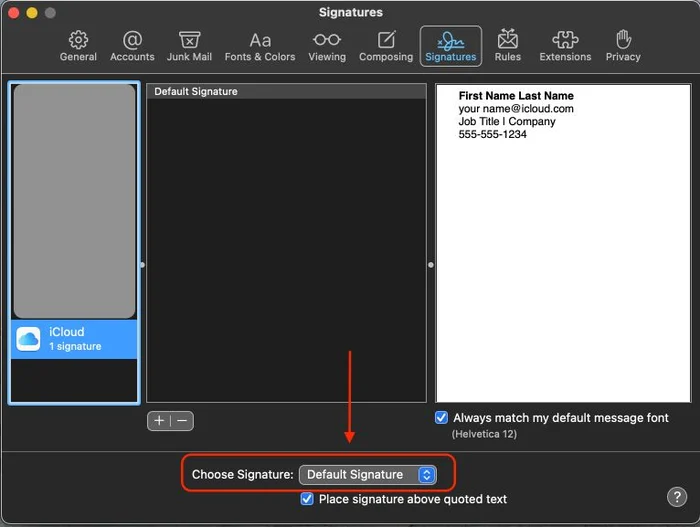
If you want to change or remove signatures that are automatically added to your Apple Mail emails, you can use the ‘Signature’ dropdown menu in a new email and choose ‘None’ or a different signature.
How to add logos to email signatures in apple mail
You can use your Mac computer or laptop to add a logo to your email signature with the Apple Mail image in signature feature. This is one of the best features for Apple users.
To add a logo to your Apple Mail signature:
1. First, Add an image file of your logo to your Mac desktop.
2. Then, Open the Mail app.
3. Now, click on ‘Mail’ and then ‘Preferences’.
4. Then, Select ‘Signatures’.
5. Finally, Drag the image file from your desktop and drop it to the right column where you can edit your signature.
And that’s it! Your logo image will appear in your Apple Mail signature. (You can remove it by highlighting the image and hitting ‘delete’.)
How to add HTML signatures to Apple Mail
Apple Mail restrict you to paste HTML code directly in the ‘Signatures’ pop-up menu. Instead, you’ll need to create a new signature and then find and edit the signature file on your Mac.
But an easy way is to get a custom-formatted signature to Apple Mail using SyncSignature’s free Email Signature Generator.
To add your custom signature to Apple Mail after creating it on SyncSignature:
1. Copy your email signature.
2. Then, open the “Mail” app, then navigate to ‘Mail’ and ‘Preferences’.
3. Select ‘Signatures’.
4. Create and label a new signature, and uncheck the box that says ‘Always match my default message font’.
5. Paste your signature in the right column, and that’s it! Your custom signature will appear when you draft a new email.
You can customize your email signature on Apple Mail in a few minutes. If you need to make changes, it’s simple to go back and edit or create variations.
Mac email signature FAQs
How do I add a logo/picture/image to my MacMail signature?
- Click on the “Mail” icon from the doc at the bottom of the screen.
- Then click on “Mail” in the top right corner.
- From the drop-down menu, click on “Preferences”.
- In the pop-up box, click on the “Signature” tab, and customise accordingly (see detailed tutorial above).
- Keep the signatures tab open while you open “Finder” from the doc.
- Drag the picture you want into the text box in the signatures tab. And you’re done!
Why is my Mac Mail signature not showing?
When you launch the Mail app and draft a new email, your signature won’t show automatically.
You’ve got to select the “Signature” tab on the right, and choose from the drop-down menu.
You’ve also got to make sure you added the signature to the relevant account.
To do this: click on the “Mail” icon > click on “Mail” in the top right corner > select “Preferences” from drop-down menu > click on “Signature” > check that signature that you’ve set up corresponds with either: “All Signatures” or the specific account (these options are on the left of the text box).
How can I change the font on my Mac Email signature?
- Click on the “Mail” icon at the doc (bottom of the screen).
- Click on “Mail” in the top-right corner, and select “Preferences” from the drop-down menu.
- Click on the “Signature” tab at the top, once the box of preferences pops up.
- Highlight signature you want to edit the font for.
- Right-click, and click on “Format”.
- Then click on “show fonts” and choose the font you want.

